[3]. pacemaker 설치
- 운영 체제 구성
Pacemaker는 경우에 따라 허용된 수를 모두 사용할 수 있는 많은 프로세스를 만듭니다. 이 경우 클러스터 노드 간의 하트비트가 실패하고 리소스의 장애 조치(failover)가 발생할 수 있습니다. 다음 매개 변수를 설정하여 허용되는 "최대 프로세스 수"를 늘리는 것이 좋습니다.- vi 편집기를 이용해 configuration file 설정
sudo vi /etc/systemd/system.conf - Change the DefaultTasksMax
 #DefaultTasksMax=512
 DefaultTasksMax=4096
- Activate this setting
sudo systemctl daemon-reload - Test to ensure that the change was successful
sudo systemctl --no-pager show | grep DefaultTasksMax
- 더티 캐시의 크기를 줄입니다. [vi 편집기 이용]
sudo vi /etc/sysctl.conf# Change/set the following settings vm.dirty_bytes = 629145600 vm.dirty_background_bytes = 314572800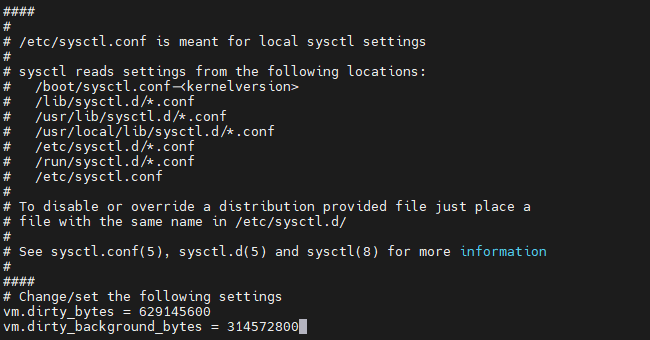
- 스왑 사용량을 줄이고 메모리를 선호하려면
vm.swapiness가 10으로 설정되어 있는지 확인합니다.# Change/set the following setting vm.swappiness = 10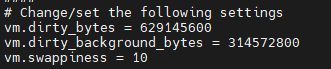
# Change/set the following settings vm.dirty_bytes = 629145600 vm.dirty_background_bytes = 314572800 # Change/set the following setting vm.swappiness = 10 - vi 편집기를 이용해 configuration file 설정
- cloud-netconfig-azure 구성
클라우드 네트워크 플러그 인이 가상 IP 주소를 제거하는 것을 방지하려면 Pacemaker가 할당을 제어해야 하므로 다음 코드와 같이 네트워크 인터페이스에 대한 구성 파일을 변경합니다.- Edit the configuration file
sudo vi /etc/sysconfig/network/ifcfg-eth0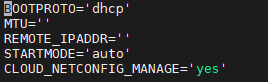
- CLOUD_NETCONFIG_MANAGE 부분을 no로 수정
- Edit the configuration file
-
Keygen 작업
No Keygen 1 NO1 SERVER keygen 생성 2 NO1 copy the public key 확인 3 NO2 > NO1 SERVER의 authorized_keys에 복사 4 NO2 SERVER keygen 생성 5 NO1 > NO2 SERVER의 authorized_keys에 복사 6 NO1 copy the public key 확인 7 노드간 키 교환 상태 테스트 SSH 진행 - NO1 SERVER keygen 생성
sudo ssh-keygen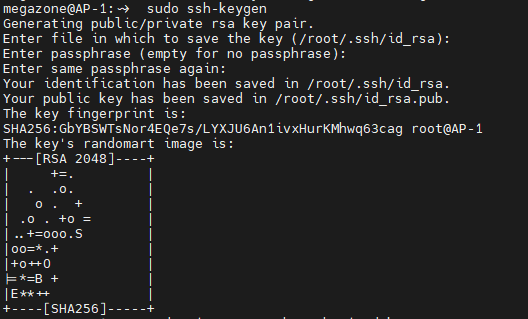
- NO1 다음 명령어 실행 후 public key 복사
sudo cat /root/.ssh/id_rsa.pub
- NO2 > NO1 SERVER의 authorized_keys에 복사
sudo vi /root/.ssh/authorized_keys
- NO2 SERVER keygen 생성
sudo ssh-keygen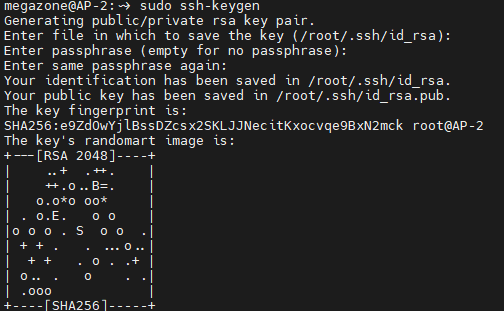
- NO2 copy the public key 확인
sudo cat /root/.ssh/id_rsa.pub
- NO2 > NO1 SERVER의 authorized_keys에 복사
sudo vi /root/.ssh/authorized_keys
- NO1 SERVER서버에서 NO2 SSH접근 테스트
ssh <node2서버 계정>@<node2서버 ip>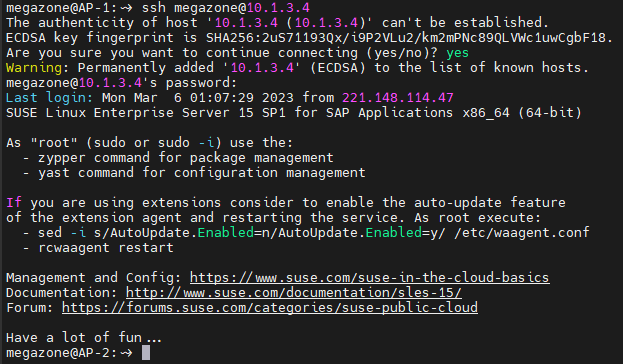
- NO2 SERVER서버에서 NO1 SSH접근 테스트
ssh <node1서버 계정>@<node1서버 ip>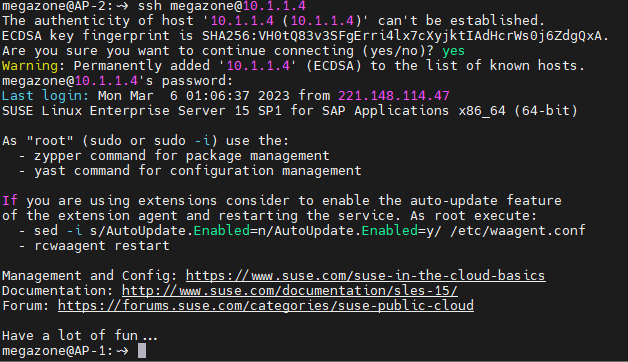
- ip 확인 명령어
ip address
- NO1 SERVER keygen 생성
-
host 등록
- 필요한 패키지 및 모듈 설치작업
Azure에서 제공되는 SUSE리눅스로 작업시 이미 설치된 내용이므로 SKIP- Azure 펜스 에이전트를 기반으로 fence-agents 패키지를 설치
sudo zypper install fence-agents - Azure Python SDK 및 Azure Identity Python 모듈을 설치
공식문서는 버전 15.1로 되어있으나 실제 버전(15.3)과 동일한 버전으로 설치해야함
 # You might need to activate the public cloud extension first. In this example, the SUSEConnect command is for SLES 15 SP1
 SUSEConnect -p sle-module-public-cloud/15.3/x86_64
 sudo zypper install python3-azure-mgmt-compute
 sudo zypper install python3-azure-identity
- Azure 펜스 에이전트를 기반으로 fence-agents 패키지를 설치
- [NO1, NO2] host name 설정
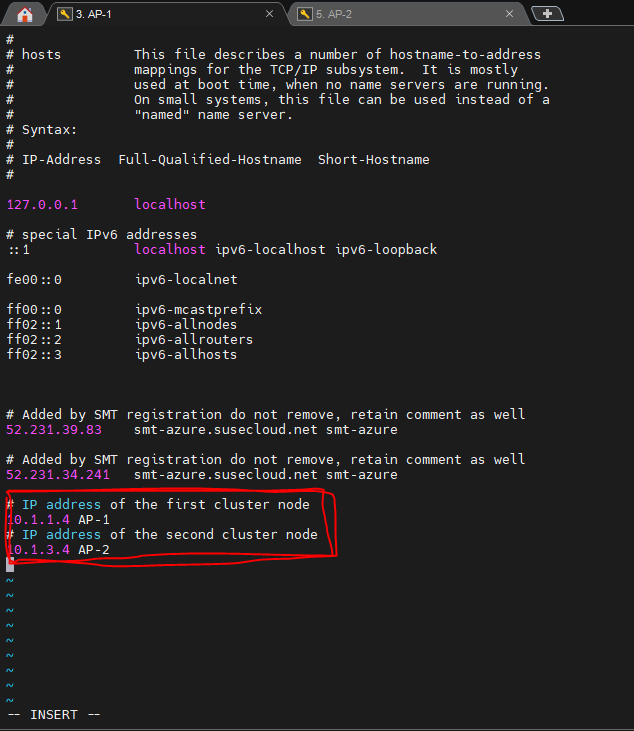
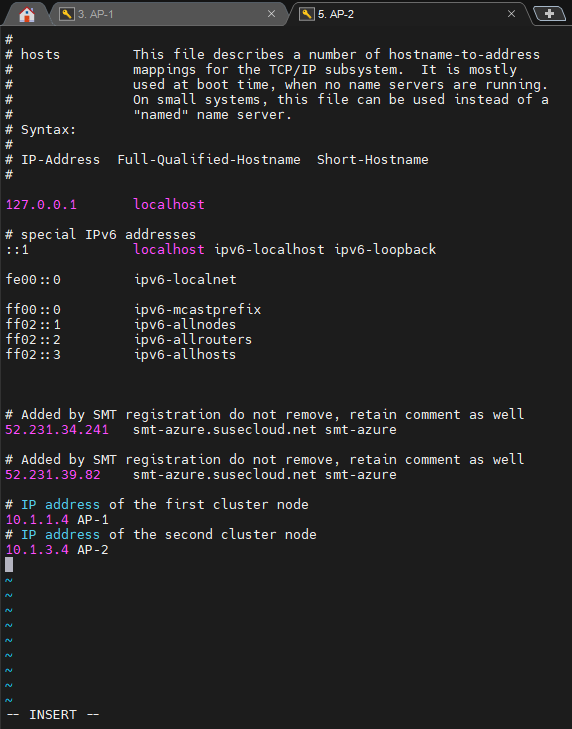
실제 구성시 등록할 VM의 수 만큼 등록해야함 각 노드의 수 만큼 IP정보와 지정할 도메인(hostname) 이름 등록
# IP address of the first cluster node <NO1 서버의 Private PI> <hostname 또는 지정할 노드 도메인 이름> # IP address of the second cluster node <NO2 서버의 Private PI> <hostname 또는 지정할 노드 도메인 이름>- 각 노드의 ip와 hostname 확인
 ip address
 hostname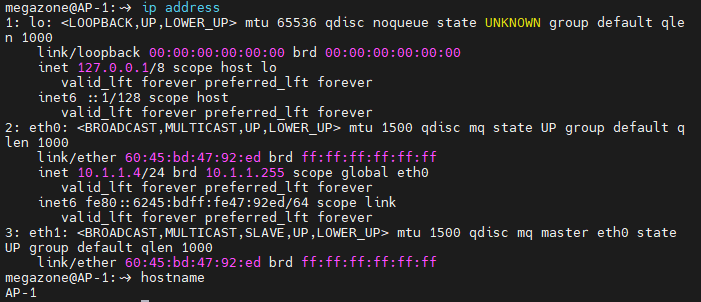
- host 등록
sudo vi /etc/hosts- NO-1 Server
- NO-2 Server
- NO-1 Server
- 등록한 도메인 이름으로 ping test
ping <등록도메인 이름>- NO1 SERVER에서 NO2 SERVER로 ping 테스트
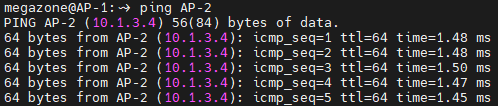
- NO2 SERVER에서 NO1 SERVER로 ping 테스트

- NO1 SERVER에서 NO2 SERVER로 ping 테스트
- 각 노드의 ip와 hostname 확인
- 필요한 패키지 및 모듈 설치작업
- 클러스터를 설치
# 클러스터 중지 명령어 sudo crm cluster stop- [NO1] SERVER에 클러스터 설치
sudo crm cluster init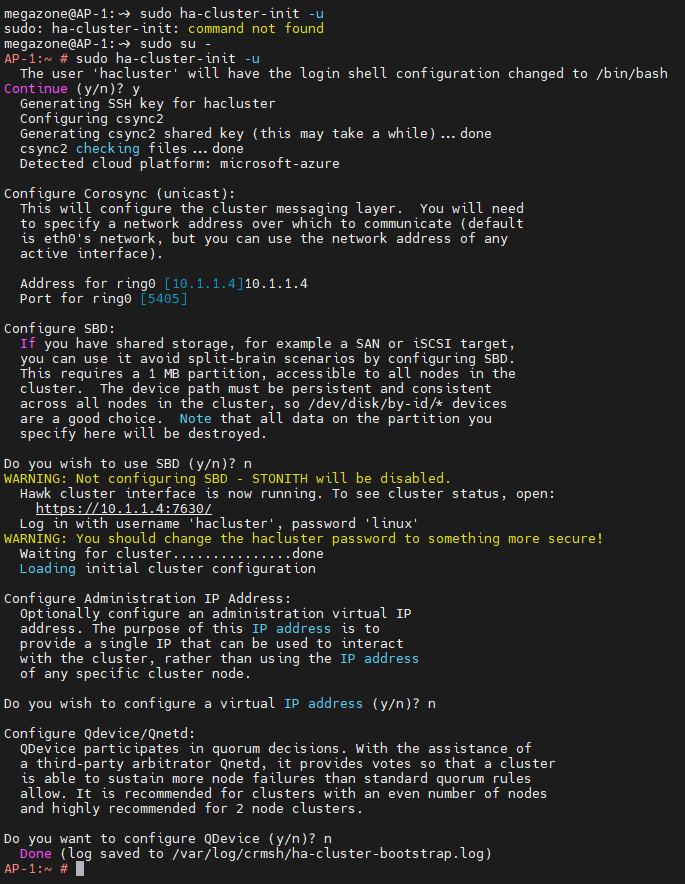
- [NO2] SERVER에서 클러스터에 노드 추가
sudo crm cluster join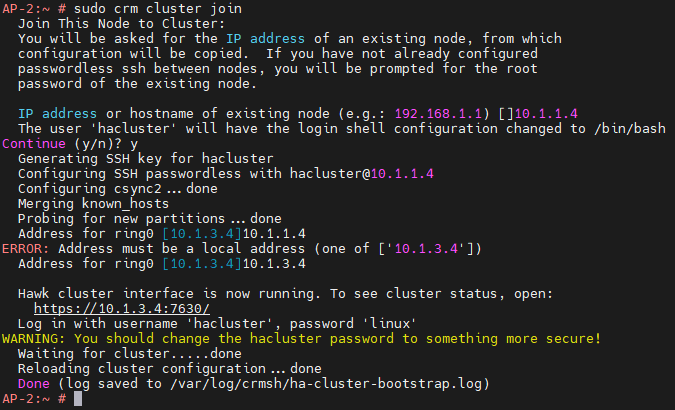
- hacluster 계정의 비밀번호 설정
sudo passwd hacluster- NO1 SERVER

- NO2 SERVER

- NO1 SERVER
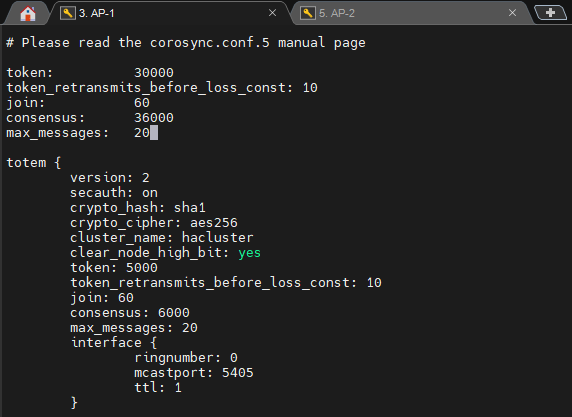
- corosync 설정을 조정
sudo vi /etc/corosync/corosync.conf- 아래 내용 추가
 token:          30000
 token_retransmits_before_loss_const: 10
 join:           60
 consensus:      36000
 max_messages:   20
- NO1 SERVER
- NO2 SERVER
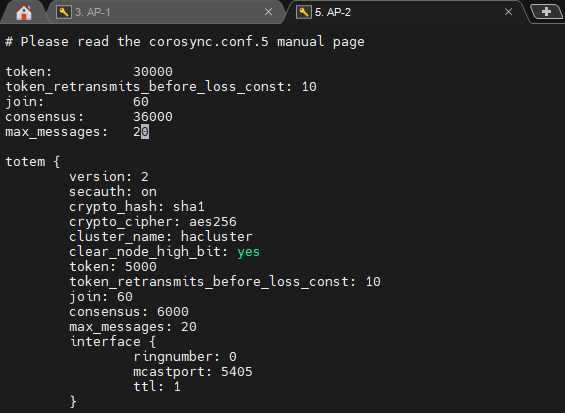
- 아래 내용 추가
- corosync 서비스 재시작
sudo service corosync restart - 웹 접속 후 로그인
 인바운트 포트 : 7630 등록 후 공용ip로 접근시
 아래 이미지와 같은 로그인 화면이 나온다면 성공

 id : hacluster
 pw : 지정한 비밀번호

 5-3번에서 지정한 비밀번호를 등록했다면
 로그인이 정상적으로 되는것을 확인할 수 있다.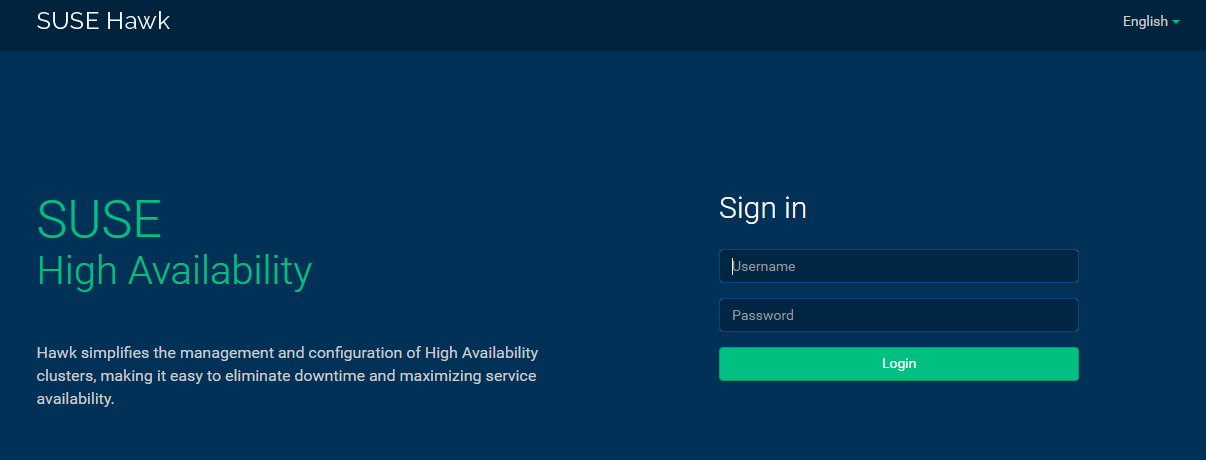
- [NO1] SERVER에 클러스터 설치